Showing posts with label distressed water marble. Show all posts

Saturday, September 20, 2014

31DC2014 Day 20: Green Distressed Water Marble


Once again for this year I chose to do a green water marble. Actually, sometimes the nail polish chooses YOU. Haha, kidding, I chose it. This year I added a little twist by doing my distressed water marble technique, which I made a tutorial for here. I love this technique because it's so unpredictable. Every mani turns out truly unique. 

Saturday, April 19, 2014

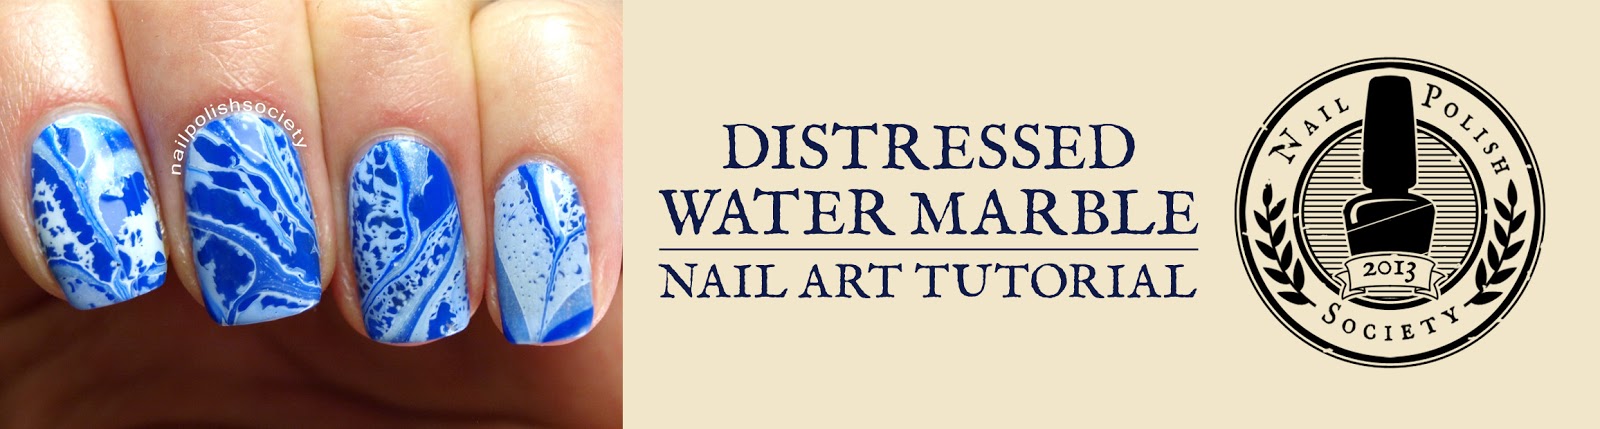
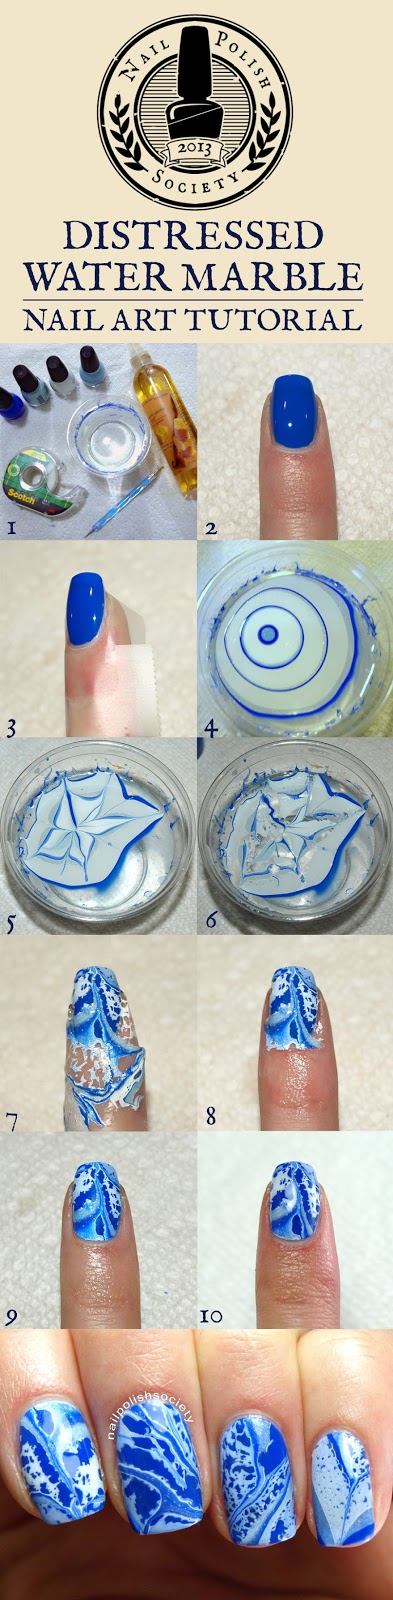
Tutorial: Distressed Water Marble


Hello all my wonderful Society ladies! I asked for some feedback on what you would like to see more of on Nail Polish Society, and the majority of you said you want more tutorials. So guess what.. I listened! I got a really good response when I debuted my amazing Distressed Water Marble nails recently, and wanted to share this technique with everyone. Now I have a tutorial so you can try it for yourselves!


What you'll need:

  • cup (not styrofoam!) full of filtered, room-temperature water
  • tape to prep skin for easy cleanup, or vaseline
  • perfume, body spray, hairspray- something with a pump spray and high alcohol content
  • toothpicks, orange stick, or dotting tool to create design in polish and cleanup
  • polishes that you've tested and know spread out well in the water

What to do:


  1. Get all your tools, and water ready. Have your polishes prepared with all the lids unscrewed. 
  2. Apply base color that will contrast against one or all shades in your water marble.
  3. Prep around nail by taping over the skin for easy cleanup. You could also use Vaseline on your skin to help the polish easily wipe off. It works really well, but I personally end up getting Vaseline all over my bottles, etc.
  4. Start your water marble by adding a drop of polish in the water. Do this close to the water surface. You can even touch it to the water if you struggle to get the drop off the brush. Don't drop it from too high or it will sink to the bottom. Repeat this process until multiple rings are formed.
  5. Create design by dragging an instrument through the polish. Do this quickly as the polish will start drying.
  6. Spray perfume/hairspray/alcohol at about a distance of four to six inches (10 to 15 centimeters). You can experiment with the distance to create different effects. After you spray the polish once or twice, give it a few seconds to break apart. 
  7. Choose a section of the design you like and place a nail over it, then dip it in. Keep your nail under the surface of the water until you have removed the excess polish off the surface of the water with instrument. You can do more than one nail at a time if there is more than one section you want to use, and if your fingers can reach it. Remove finger from the water.
  8. Carefully remove tape.
  9. Cleanup excess polish off skin and cuticle with q-tip and acetone, or for a more precise and lint-free solution, use a short and stiff bristled cleanup brush.
  10. Apply a generous amount of topcoat (I prefer fast-drying formulas) to avoid smearing the polish, as it will be delicate. Start with one big dollop and lightly spread it to cover the nail. Let it dry. You're finished! Sit back and enjoy your beautiful nails :)


Polishes I used:
Sinful Colors Endless Blue- royal blue
Sinful Colors Cinderella- light blue with pink microglitter
Sinful Colors Snow Me White- white
Seche Vite top coat


I would love to see your interpretation! If you try it, show off your creation on my facebook page, or by hashtagging #hellonailpolishsociety on twitter,

I hope this tutorial is helpful. Feel free to share it! Let me know in the comments what you think, and if you have any questions!

Saturday, March 29, 2014

Distressed Water Marble

Hey everyone! For today's mani I had this BRILLIANT idea of combining water marbling with one of my favorite nail art techniques, water spotting! Let me introduce you to.. distressed water marbling! Maybe someone had already already done this? If so, I've never come across it. Don't ruin it for me, let me think I invented this okay?


To start, I applied my base color, two coats of OPI My Vampire is Buff. Then I picked a ton of colors I thought would look together. I tested them all in the water to see which ones would spread out well.

I eventually narrowed it down to five polishes and started my water marble. I made as many rings of polish in my plastic cup as would spread out, then with my toothpick I dragged through the rings making little swirly designs.

Next I used some perfume (to make use of the high alcohol content and pump spray nozzle) and sprayed directly on the polish. This created the spotted/distressed look. I dipped my finger in a part of the design that I liked, and then before pulling it out, cleaned up the excess polish off the surface of the water with a toothpick. There weren't very many usable areas, so I ended up going through the whole process for each nail. Yeah, I know. It took forever. Totally worth it though.

It might be useful to mention that I had prepped around the nail with Scotch tape to make cleanup easier. I finished it all off with a coat of Out The Door Northern Lights top coat!


My thumb came out so awesome! It looks just like what I had in mind.


It's been quite awhile since I last used Out The Door Northern Lights, and I don't know why it has been so long! It is so beautiful with the tiny holographic sparkles. 


What I used:
OPI My Vampire is Buff
OPI Every Month is Octoberfest
Essie Lilacism
OPI Dutch You Just Love OPI?
China Glaze In a Lily Bit
Sephora by OPI Iris I Was Thinner
Out The Door Northern Lights top coat

So what do you think? I am pretty happy with the results! Is this something you would try? If you do, I'd love to see it!