Hello my Society Sisters! Who's ready for the three day weekend? Well if your nails are not ready for tomorrow's holiday, I'm here to help! I have 18 easy-to-do nail art ideas for the 4th of July. They work great for mix and matching, as an accent nail, or whatever your heart fancies! Read on for a breakdown of each look.
1. Stars Studs
Paint your studs with whichever color of nail polish you want. One they're dry, place dots of clear polish where you want the studs to go and put the studs in place.
studs from Born Pretty Store
2. Alternating Dots
Start with base color. Choose two or three different shades for dots. With dotting tool, toothpick, or bobby-pin, add dots in alternating colors
Clinique Strappy Sandals
3. Fishtail Braid
Choose three polishes that can be opaque, or almost, in one coat. Start with base color. Apply your first diagonal stroke starting near the cuticle and ending at the side of the nail. Wait a minute or two after each one. Use your third polish to cross over. Apply next stroke with base color polish starting below the first stroke and crossing over second. Repeat until complete.
Clinique Strappy Sandals, American Apparel Downtown LA, Sally Hansen Pacific Blue
4. Dry Brushstroke
Start with a white base. Once that is sufficiently dry choose three or four more shades. Wipe polish off on lip of bottle until almost no polish remains. Drag a few strokes over the nail, getting more polish from bottle if needed. Repeat with other shades.
5. Glitter Placement
Apply base color. Then with waxy pencil or toothpick dipped in clear polish, place glitters one by one. If the base polish isn't tacky anymore, apply a stripe of topcoat down the nail, then place the glitters. Finish with topcoat.
glitter from Born Pretty Store
6. Dotty
Start with base color. Make sure the base is completely dry. Cut tape in a large "V" shape and place on nail. Apply polish between tape, then quickly remove tape. Add dots.
Formula X for Sephora Beacon, Sinful Colors Snow Me White
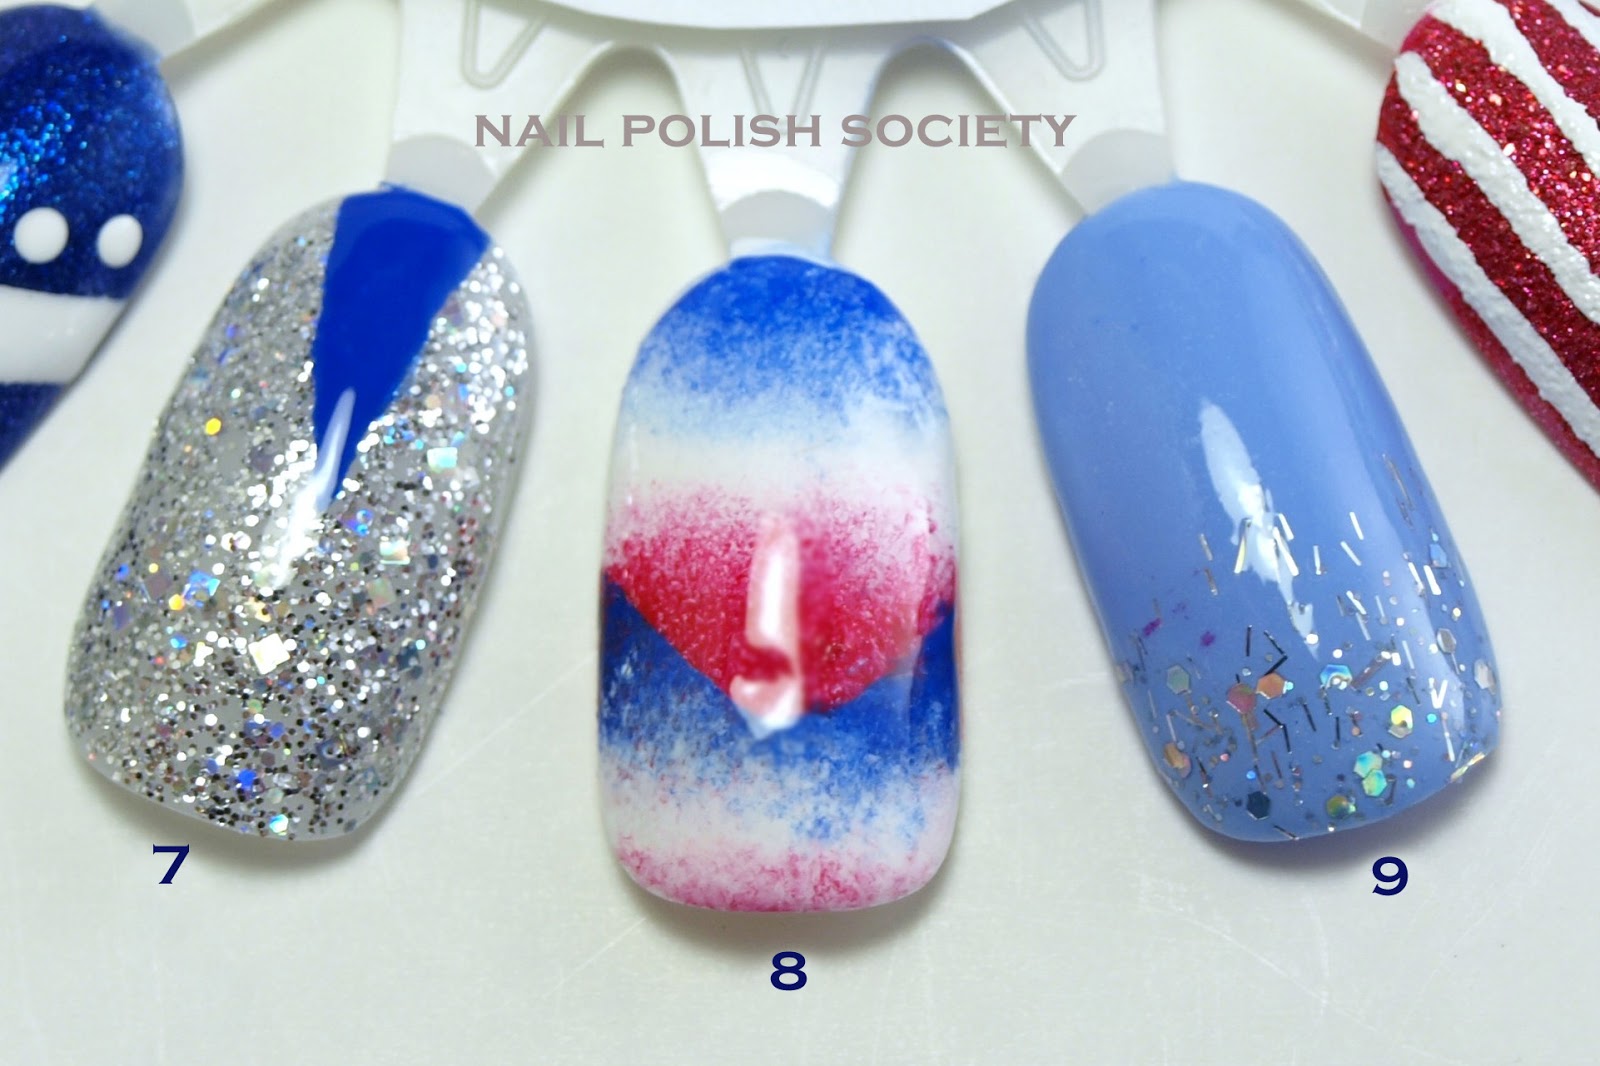
7. Skinny Triangle
Apply base color and make sure it's completely dry. Using two sides of tape, create skinny triangle shape. Apply polish between tape, then quickly remove tape.
OPI True Stephani Fashion
8. Double Gradient
Apply white base color. On a wedge makeup sponge, paint three polish shades. Dab the sponge on nail. Repeat for desired opacity. Add topcoat. When completely dry, use tape or hole reinforcement over bottom half of nail. Repeat the sponge method and remove tape quickly. Finish with another application of topcoat
9. Glitter Tips
Apply base color. Apply glitter at tip of nail. For added interest, apply second glitter over the first and farther down the nail.
Nicole by OPI Stars at Night, PiCture pOlish Glitter Ball
10. Textured Stripes
Apply textured polish. Add stripes with striping polish or striping brush. Do not apply topcoat.
Formula X for Sephora Nova
11. Matte With Glossy Dots
Start with base color. Apply matte topcoat. Using a dotting tool, add dots with regular topcoat.
Sinful Colors Endless Blue
12. Contrasting Frame
Start with base color. Let it dry a little. With striping brush, paint contrasting polish along the edges of entire nail.
OPI Love.Angel.Music.Baby, OPI Dating A Royal
13. Wonder Woman
Start with silver base color. Using the brush from the red polish bottle, freehand rounded shapes. With the blue polish, freehand the opposite shapes to create V-like shape.
Wet n' Wild Chrome Steel The Spotlight
14. Firecrackers
Start with white base color. With small brush create starbursts near cuticle. With another shade
create starbursts at tip.
15. Halfmoon
You can either start with a base color of red and freehand a rounded shape at cuticle. Or you can start with a white base color, let dry completely, and use a hole reinforcement to mask of near cuticle and paint red polish above it.
OPI Red Hot Ayers Rock
16. Squiggly Doodles
Start with base color. Choose three or four contrasting shades. Using a striping polish or striping brush, doodle on random squiggles.
Clinique Strappy Sandals
17. Chevron Stripes
Start with white base color. Using craft scissors cut skinny pieces of tape and place on nail. Get edges as flush with the nail as possible. Apply red polish over entire nail. With tweezers quickly remove all pieces of tape.
American Apparel Downtown LA
18. Jelly Pastels
Start with white base color. Freehand stripes with brush from the polish bottle
Sally Hansen Triple Shine Water Melon and Ice Tint
With all these ideas, there are no excuses for boring nails! Now let's get painting our nails, and everyone have a safe and fun Independence Day!


No comments:
Post a Comment
I love to hear your comments!